(Note: if you are a "Full-Service" client, your ability to modify/create requirements categories yourself will be limited. Please reach out to your assigned customer success manager to do so, or simply email: customersuccess@getbcs.com )
Setting up General Requirements
Select what third parties you wish to create/edit a requirement category for - Vendors or Tenants.
Setting up Agreement-specific Requirements
If you're in real estate, most likely you'll want to set up requirements for tenants that are lease-specific. Here's an explanation on how to accomplish that. Setting up agreement-specific requirements.
How to Edit Compliance Requirements for Vendors or Tenants
You can easily configure or edit the compliance requirements for your vendors, tenants, subcontractors, or franchisees. This allows you to define what policies, documents, and endorsements are required for each category of partner.
1. Understanding Compliance Structure
Compliance in the system is determined by two main factors:
-
Locations — These determine which entities must be listed as additional insured on a vendor or tenant’s evidence of insurance.
-
Requirement Categories — These define which insurance policies, limits, endorsements, and documents are required for compliance.
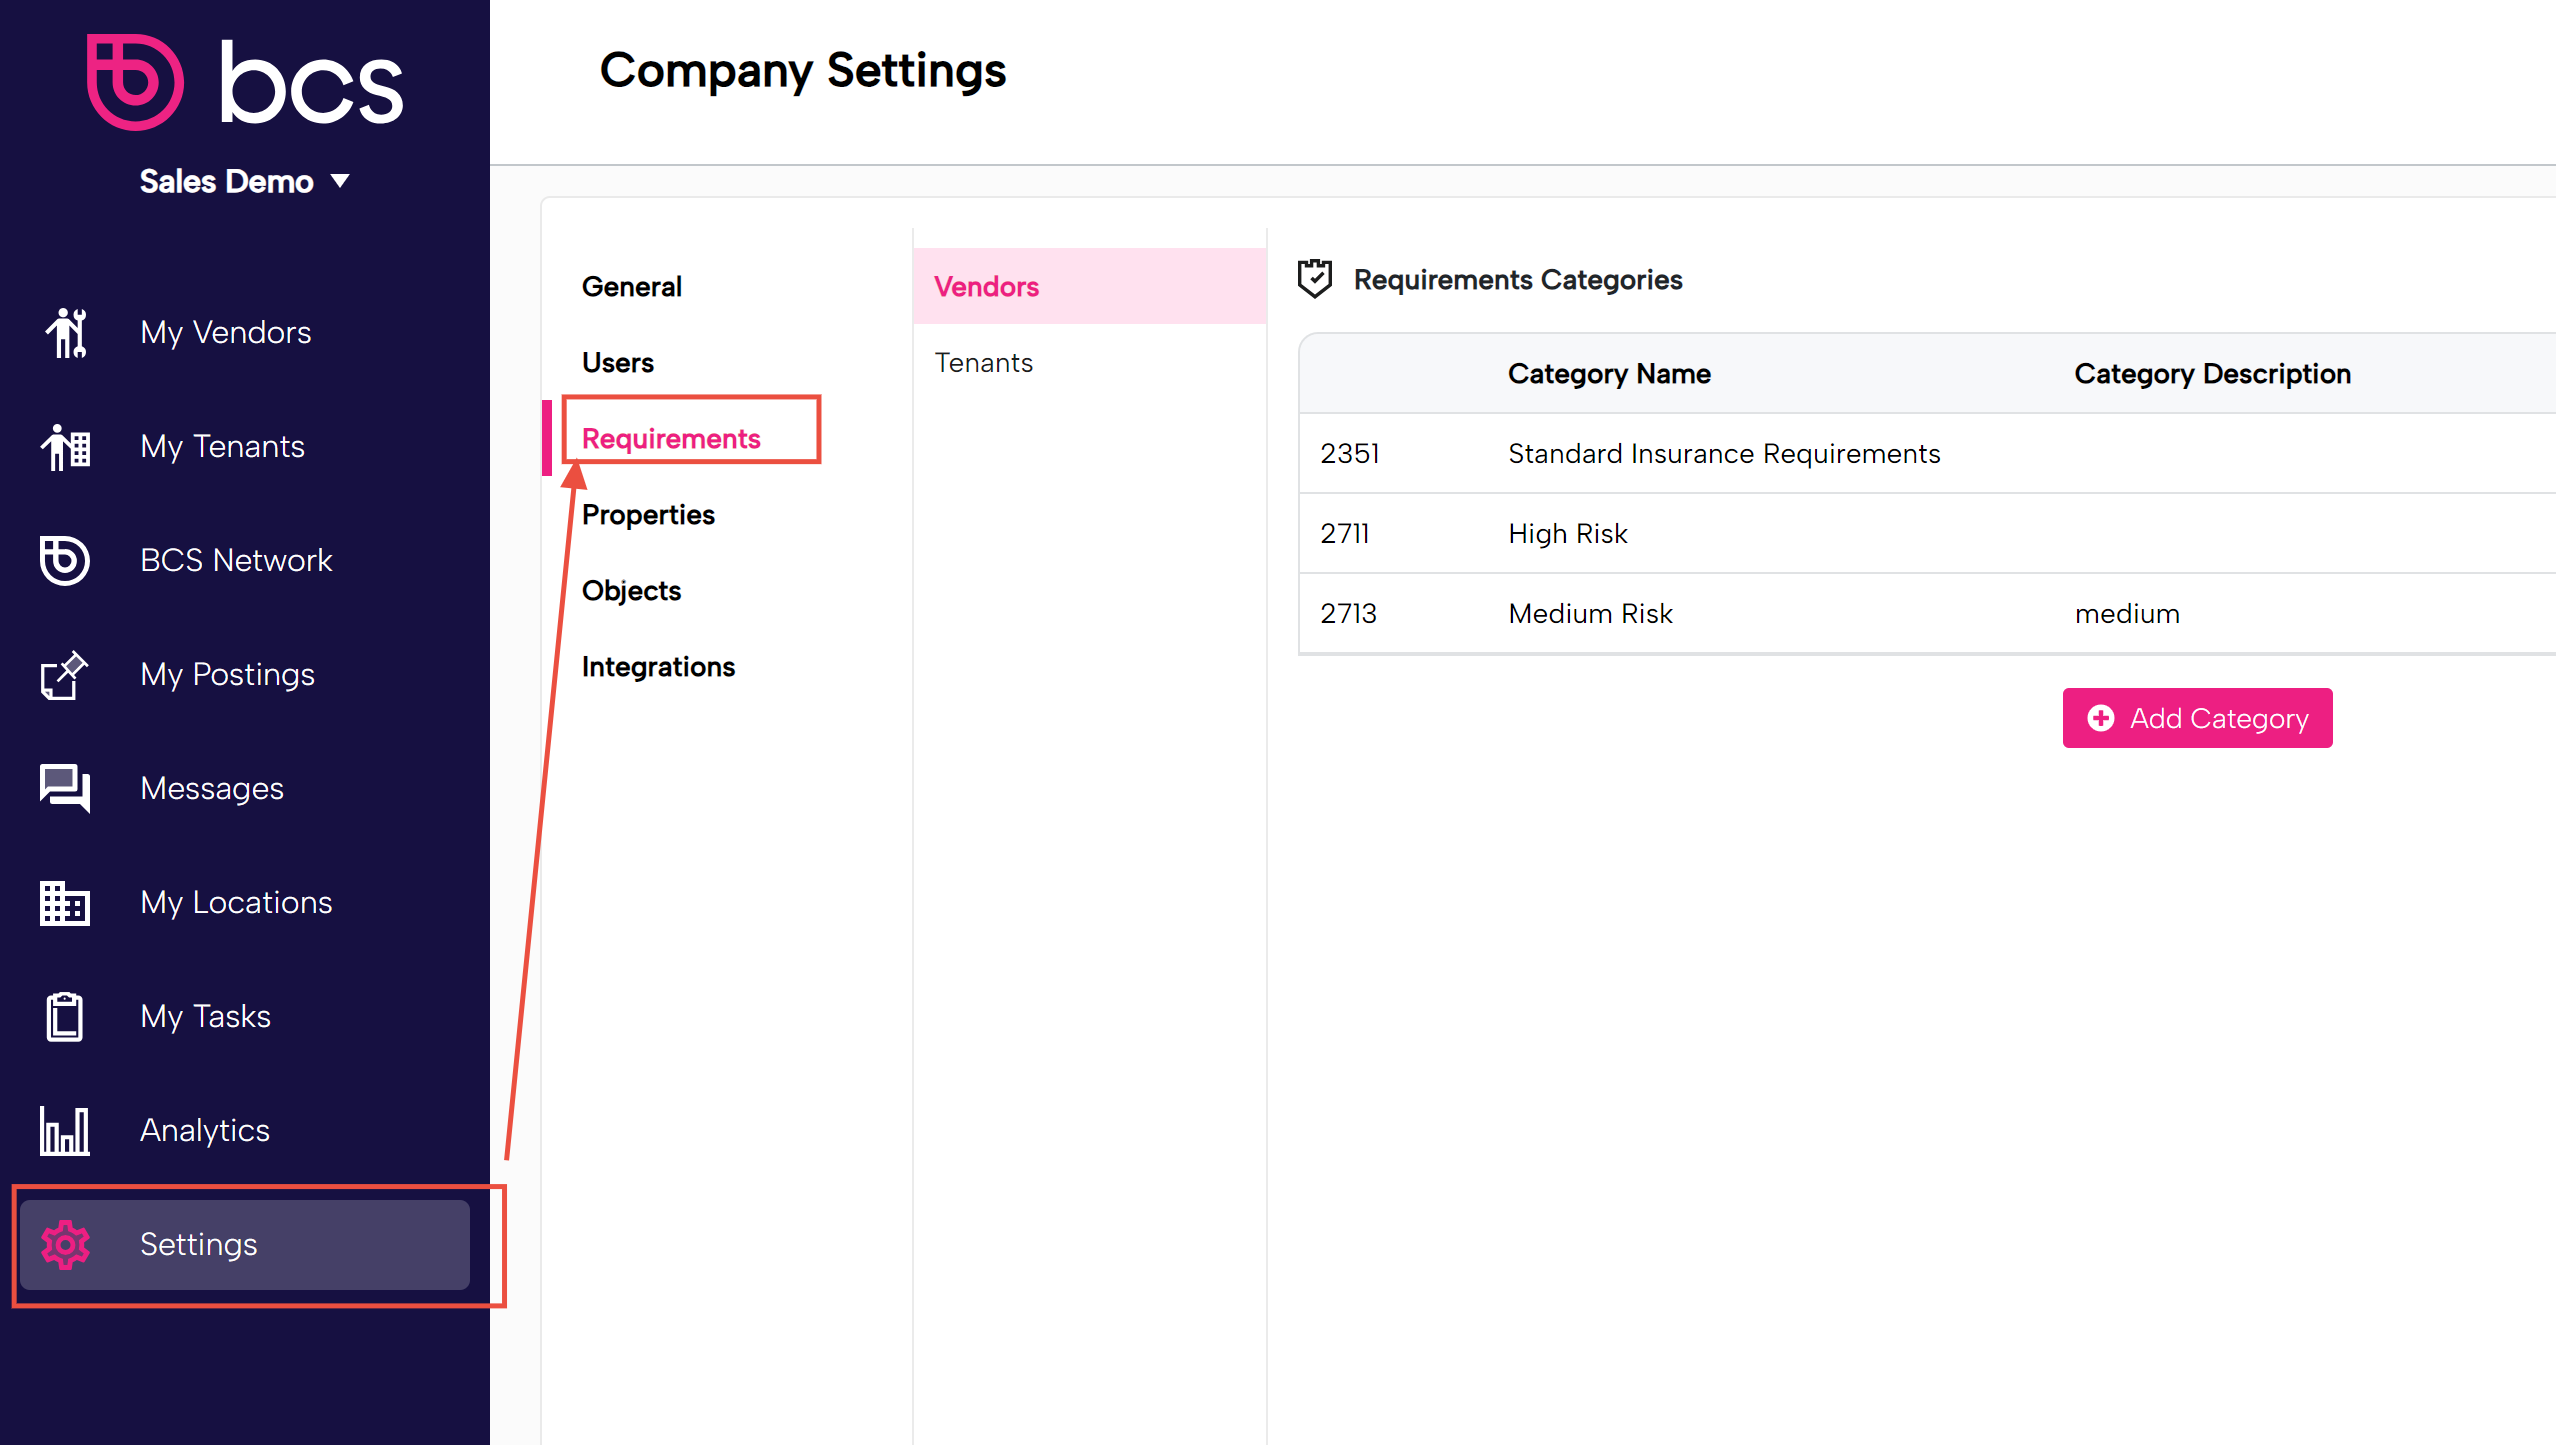
2. Accessing Requirement Categories
-
From the main menu, go to Settings → Requirements.
-
You’ll see separate requirement categories for Vendors and Tenants.
-
Select the section you want to modify — for example, Tenant Requirement Categories.
3. Creating or Editing a Requirement Category
You can either edit an existing category or create a new one.
-
Click New Category.
-
Enter a name — for example, Tier 2 Tenants.
-
Go to the Insurance section to start defining the requirements.
4. Setting Up Insurance Requirements
a. Choose a Certificate Holder
Decide who should be listed as the certificate holder on the tenant’s certificate of insurance:
-
Standardized Certificate Holder, or
-
Location-based Certificate Holder (the system will automatically reference the specific location).
b. Define Carrier Ratings
Select the minimum acceptable AMS rating for insurers — e.g., A–7 is a typical standard.
c. Add and Edit Policies
-
Add the policies you want to track (e.g., Property Coverage).
-
Edit the limits — for example, set property limits to $1,000,000.
-
Remove any policies you don’t need (e.g., Workers’ Compensation).
5. Selecting Insurance Provisions
Expand the Insurance Provisions section to view available items.
-
Automatic items: These can be automatically reviewed by the system’s extractor (no manual review needed).
-
Manual items: These require human review.
Check off the provisions you want to include in compliance tracking. The system will automatically detect these on uploaded certificates.
6. Configuring Description of Operations
In the Description of Operations section, you can specify text that must appear on certificates.
-
Example:
[Your Company Name] is listed as an additional insured.The system will automatically look for these keywords in uploaded certificates.
You can also use dynamic variables, such as location entities, so the system checks for the correct entities based on where the tenant or vendor operates.
7. Adding Endorsement Requirements
You can specify which endorsements must be included.
For example:
-
Require Additional Insured – Ongoing Operations endorsement for Commercial General Liability.
-
Optionally allow Blanket Endorsements.
By default, the system always ensures that the location’s ownership entities are listed as additional insureds.
8. Adding Document Requirements
Add any additional documents you want to track for compliance.
Examples include:
-
Professional Licenses (with expiration tracking)
-
W-9 Forms
Each document can be set as a mandatory requirement under the category.
9. Saving and Using Your Requirement Category
Once you’ve configured your settings, click Save.
Your new requirement category will now appear when adding or editing a tenant or vendor.
10. Configuring Locations and Ownership Entities
-
Navigate to Locations to manage your project sites or properties.
-
Click a location to view its details and associated ownership entities.
-
Add, edit, or remove entities as needed.
-
Example: Add Realty Joint Venture LLC as a new ownership entity.
-
These entities are automatically included as additional insureds on certificates for vendors or tenants linked to that location.
11. How Requirement Categories and Locations Work Together
-
Requirement Categories define what insurance and documents are needed.
-
Locations define who needs to be listed as additional insureds.
This structure lets you manage multiple compliance requirements for the same vendor or tenant — for example, if they work at different sites with different ownership structures.
12. Example Use Case
A subcontractor working on multiple construction projects can provide:
-
A separate Certificate of Insurance for each project,
-
Each reflecting the correct requirement category and location-based insured entities.